
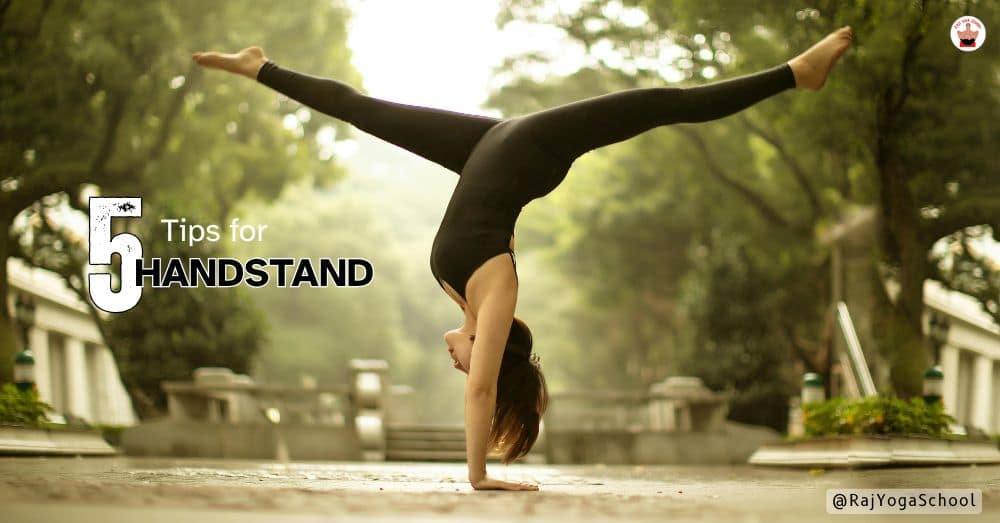
5 Secrets to a Strong Handstand
![]()
It’s no secret that I love me some handstands. But what I love even more is helping someone else get there. Seeing their face when they get that one second of hang time is priceless. But here’s the deal. There are only so many tips and cues that I can give you. There are only so many tutorials you can watch and workshops you can go to. Your best way to get yourself standing on your hands is to stand on your hands! With a wall. Without a wall. It doesn’t matter. There is no substitute for practice. You must feel it yourself. And once you get that little taste of hang time…. It’s all over. You’ll be handstanding everywhere and throwing handstand hashtags around like confetti: handstandjunkie #handstandseveryday
Here are some tips to help you get upside-down.
Here are some simple tips to help you get upside down with confidence and ease. Build strength, balance, and trust as you explore the joy of handstands.
5 Tips to Handstand:
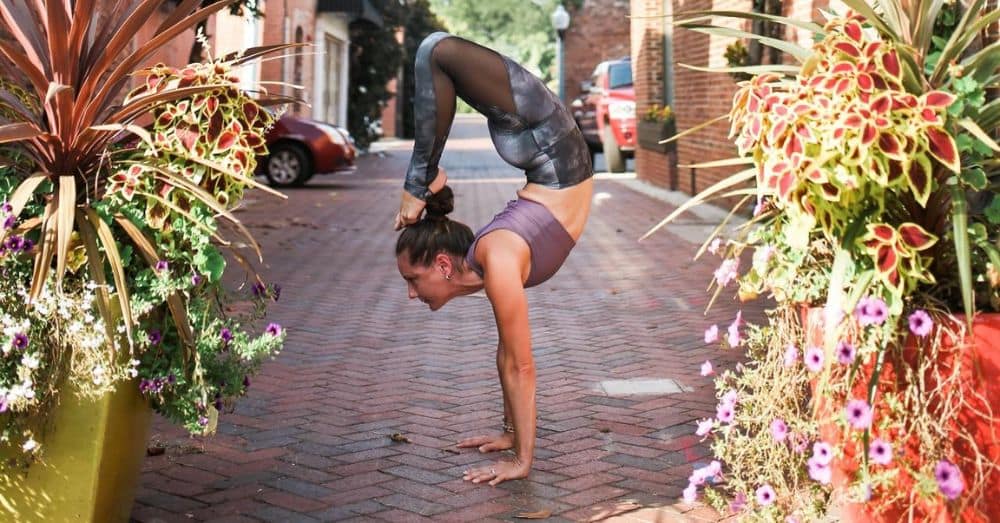
- Strong hands AND flexible wrist. This is the most important because your hands are your foundation. They need to be strong to withstand the weight, but also flexible to give yourself a little “wiggle room” while you’re up there. In the beginning (or 20 years down the road), your body will shift from side to side and from front to back. Flexible wrists allow that movement, while strong hands bring you back to vertical alignment.
- Balance on the pads of your hands and use your fingers to bring you back to alignment. Some people “teepee” their fingers. I prefer to take my fingers out wide and press the whole hand into the mat.
- Uddiyana Bandha: Pull up through the pit of the belly. It will actually look like you’re sucking in your lower belly, but keep it active. I swear, this makes you feel lighter. I don’t know how, it just does, ok! Actually, it’s because the deep core muscles are engaged, and when the muscles work together synergistically, it makes you feel lighter.
- Protract and elevate the scapulae. Press into your hands and shoulders. This “locks” the shoulder joint in place, keeping it strong and able to withstand the weight of the body. This doesn’t always happen the second I get up there. Sometimes, I get there and then make adjustments.
- Keep your legs active and glutes engaged. Notice I said active and engaged, not clenched. You’re not hanging on for dear life, but they are hugging in towards the midline. You want your whole body to work for you. If the legs aren’t active, then they might be dead weight hanging out in space. And that puts unnecessary weight on the joints and makes it harder for you to balance. So, keep your legs active!
Handstands can be so empowering…. right after hard work, sweat, aggravation, frustration, and maybe some confusion. They are hard and require patience and dedication. So, when you actually “get” it, you feel like you CAN DO ANYTHING. The journey I took to get to where I am has taught me so much about myself. What you learn may be different, but it will be just as rewarding, no doubt.
The same patience, focus, and self-discovery that a handstand teaches are precisely what you’ll explore in our 200-Hour Yoga Teacher Training. If you’re ready to deepen your practice, strengthen your body–mind connection, and share your passion with others, join us here.
Happy Handstanding!